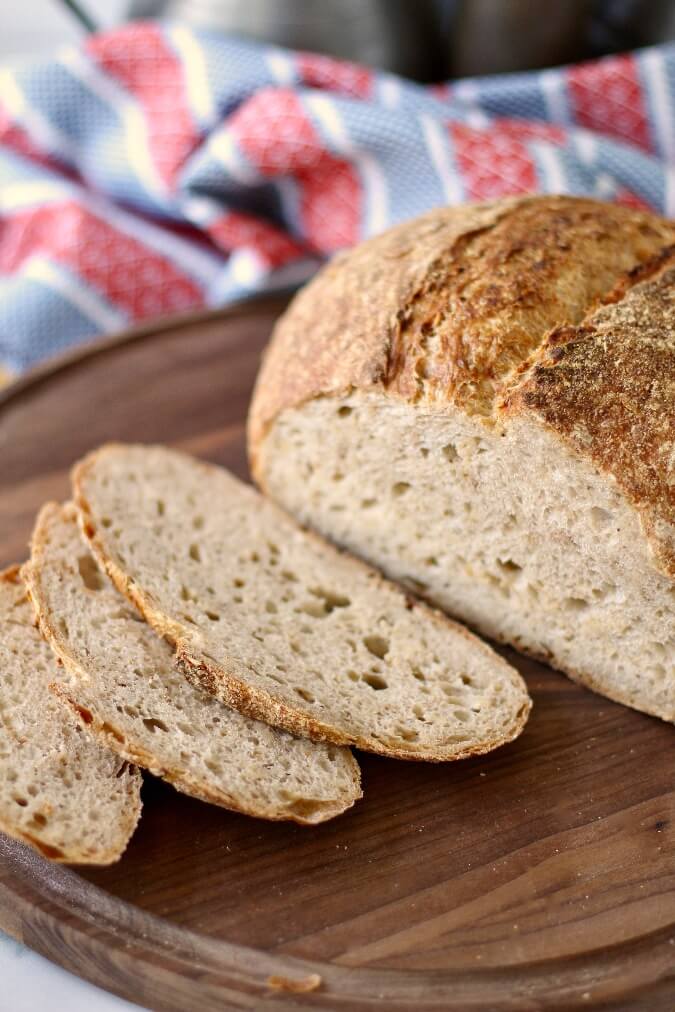
This toasted oats bread is flavored with toasted oats that have been soaked overnight before incorporating them into the dough. The toasted oats add such a wonderful nutty flavor.
This toasted oats bread is wonderful sliced and buttered, eaten with soup, and toasted for breakfast.
Toasting the oats enhances their flavor, and soaking them in boiling water softens them and helps the bread retain moisture, kind of like a tangzhong.
This bread is the bread of the month for the Bread Baking Babes, and our host is Elizabeth of Blog from OUR Kitchen.
While it seems complicated, it's really pretty easy to make. In fact, I didn't read the recipe all of the way through, and combined all of the ingredients all at once rather than waiting to add the oats and the bread turned out fine.
I did skip adding the small amount of wheat germ and wheat chops. The amounts were so small for one thing.
This bread is a combination of sifted whole wheat flour, white bread flour, water, salt, rolled oats. I also used a sourdough starter to leaven the bread. If you don't have a sourdough starter, you can add an equal amount of flour and water in its place (75 grams each) and add 2 1/4 teaspoons of instant yeast when you mix the dough.
If you do have a starter, but want to speed up the process just a little (or your starter is a little sluggish), you can "boost" the dough by adding about 1/2 teaspoon of instant yeast when you mix the final dough.
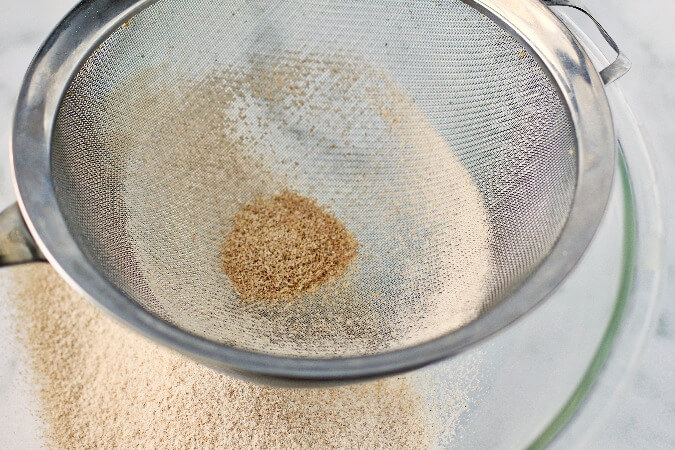
The recipe calls for sifting the whole wheat flour to separate out some of the bran. I used the reserved bran to dust the brotform for the second rise.
This process doesn't remove all of the bran, just some of it, to lighten up the flour.
How to make this bread:
The night before, feed a small amount of your starter with flour and water and cover it.
Next, toast a heaping cup of rolled oats in a hot skillet, stirring regularly, until they are fragrant. In a small bowl, pour about a half of a cup of boiling water over the oats, stir them together, cover, and let rest overnight.
The next day, mix the flours, water, and starter to form a rough dough. Let it rest for 30 minutes and then add the salt. Do enough stretch and folds to incorporate the salt and strengthen the dough. Let it rest an additional 30 minutes.
After that, fold the oat mixture into the dough using the stretch and fold method. Repeat the stretch and fold method two more times, every 30 minutes, and then let rise until doubled.
This dough is super easy to shape. Just fold the sides toward the middle, then flip it over, and using a bench scraper, scoot the dough around on your counter to create tension.
It will look a bit lumpy from the oats, but it will hold it's shape.
I let it rise in a brotform, which I dusted with a mixture of the sifted bran and some all purpose flour.
Bake the loaf in a Dutch oven that has been in the oven as it heats up, removing the lid about halfway through.
Be sure to let the bread cool completely before slicing it.
This bread had a soft crumb and stayed pretty fresh for much longer than most loaves. Perhaps it's the boiled oats that retain a lot of moisture.
After the recipe, be sure to check out the rest of the Bread Baking Babes' versions of this bread.
Toasted Oats Bread

Ingredients
- 60 grams whole wheat flour
- 60 grams water
- 30 grams of your existing starter
- 100 grams rolled oats, toasted
- 100 grams boiling water
- 100 grams whole wheat flour
- 400 grams unbleached bread flour
- 350 grams water
- all of the leavener from above
- 10 grams salt
- all of the rolled oats mixture from above
Instructions
- The night before making the bread, combine the flour, water, and starter. Cover and let sit in a warm spot.
- The night before making the bread, add the rolled oats to a dry cast iron or stainless skillet and place it over medium high heat. Stir the oats regularly, until the oats are fragrant, about 7 minutes. Transfer them to a medium bowl and stir in the boiling water. Cover and let sit overnight.
- Sift the whole wheat flour into a large mixing bowl. Reserving the bran for dusting the brotform. Add the bread flour and water to the sifted whole wheat flour. Stir with a wooden spoon or dough whisk.
- Add the starter to the large bowl. Use a dough whisk or wooden spoon to form a rough dough. Cover the bowl and let the dough rest for 30 minutes.
- Sprinkle the salt over the dough.
- With a wet hand, pinch and squeeze the salt into the dough. Keep pinching and folding the dough over itself until it is relatively smooth. Cover and let rest for about 30 minutes.
- Add the oats to the dough, and, using a wet hand, fold the dough over itself from all four "sides." Continue to fold until the oats are incorporated. Cover and let rest for 30 more minutes.
- Repeat the folding step 2 more times in 30 minute intervals. After the final time of folding, leave the covered bowl in a draft free area until the dough has almost doubled.
- Dust the insides of a brotform or a towel lined 9 inch bowl with the bran and some all purpose flour. You can also add a bit of rice flour to prevent sticking.
- Turn the dough out onto your work surface and flatten it into a disk. Without breaking the skin on the bottom, use the dough scraper to fold the dough in half. Turn the dough a quarter turn and continue folding until a ball is created. Leave it seam side down and use the sides of the dough scraper to tighten the dough ball further.
- Place shaped loaf seam-side up in the brotform. Cover with a damp tea towel or oiled plastic wrap and let sit for an hour or so to allow the loaf to almost double.
- You can use the finger dent test to see if the dough is ready (press the dough with a wet finger and if it springs back right away, wait another 15 minutes. If it comes back slowly, the dough is ready).
- Place a cast-iron combo cooker (or lidded Dutch oven) on the middle rack of your oven and preheat the oven to hot (we set ours to 450F).
- When ready to bake, remove the hot combo cooker from the oven and remove the lid. Cover your banneton with heavy duty parchment paper and place a plate over the parchment. Flip the whole thing over and lift off the brotform. Using the parchment paper, transfer the round along with the parchment on the bottom, into the hot shallow pan of the combo-cooker. Using a lame, sharp knife, or scissors, score the bread in the pattern you like.
- Bake for 30 minutes with the lid on. After 30 minutes, remove the pan from the oven and transfer the loaf to a baking sheet. Place the loaf back in the oven and continue baking for another 20 to 30 minutes, until the crust is dark golden brown and the bread sounds reaches an internal temperature of about 205 degrees F.
- Cool the loaf completely on a wire rack.
Calories
107.85Fat (grams)
0.85Sat. Fat (grams)
0.14Carbs (grams)
21.45Fiber (grams)
1.79Net carbs
19.66Sugar (grams)
0.14Protein (grams)
3.76Sodium (milligrams)
162.82Cholesterol (grams)
0.00


I kind of went with my own method too, mixing the initial dough and then doing the folding with the soaked oats. Still took all day to do it, but that makes it flexible and easy, right? Wouldn't even know where to find malted wheat chops, a brewer's supply maybe? You and I ended up with similar looking loaves!
ReplyDeleteI saw that the amount was so little and I am out of room for more ingredients =) Ours do look similar. Twins!
DeleteBrewer's supply is exactly where we got the malted chops. There WAS a brewer's supply shop about 2 blocks away. We bought malted wheat berries, malted rye berries, and malted barley berries. The proprietor very kindly crushed them in a mill he had. All three bags went into our freezer. I used up the rye chops about a year after we were at the shop, and now am half way through both wheat and barley chops. We're beginning to panic about where we will go to replace them when they run out! (We love the flavour that little bit of malt adds. It also seems to aid the rise.)
DeleteGreat looking bread, Karen. The crumb is particularly nice looking. Ha. So is the crust.... I also really like the photos showing the shaping. Fantastic!!
ReplyDeleteThanks Elizabeth. This is one of my new favorites!
DeleteWhat a beautiful golden loaf! Your crumb is very lovely as well! How smart to take photos of the shaping. My fingers were too sticky to take photos of that part of the process.
ReplyDeleteI think my dough was probably less sticky. This dough was so cohesive.
DeleteLovely loaf Karen - color crumb crust, the perfect loaf. Yes I think this one is a keeper. The wheat germ and wheat chops were small amounts. I might try double next time - if they’re in the pantry. I’m really impressed with the toasted oat in the skillet. They added such beautiful color and texture to the crumb.
ReplyDeleteNow I’m off to check out those Liege style waffles, can’t imagine all that sugar crunch 😁
Thanks so much!
DeleteBeautiful bread. Interesting to use wet oats.... I have to try this!
ReplyDeleteWhat a beautiful bread! I would love to have this crusty yommy bread anytime. I have to try this.
ReplyDeleteKaren this is another beautiful loaf! It looks perfect and I bet it's so delicious.
ReplyDelete